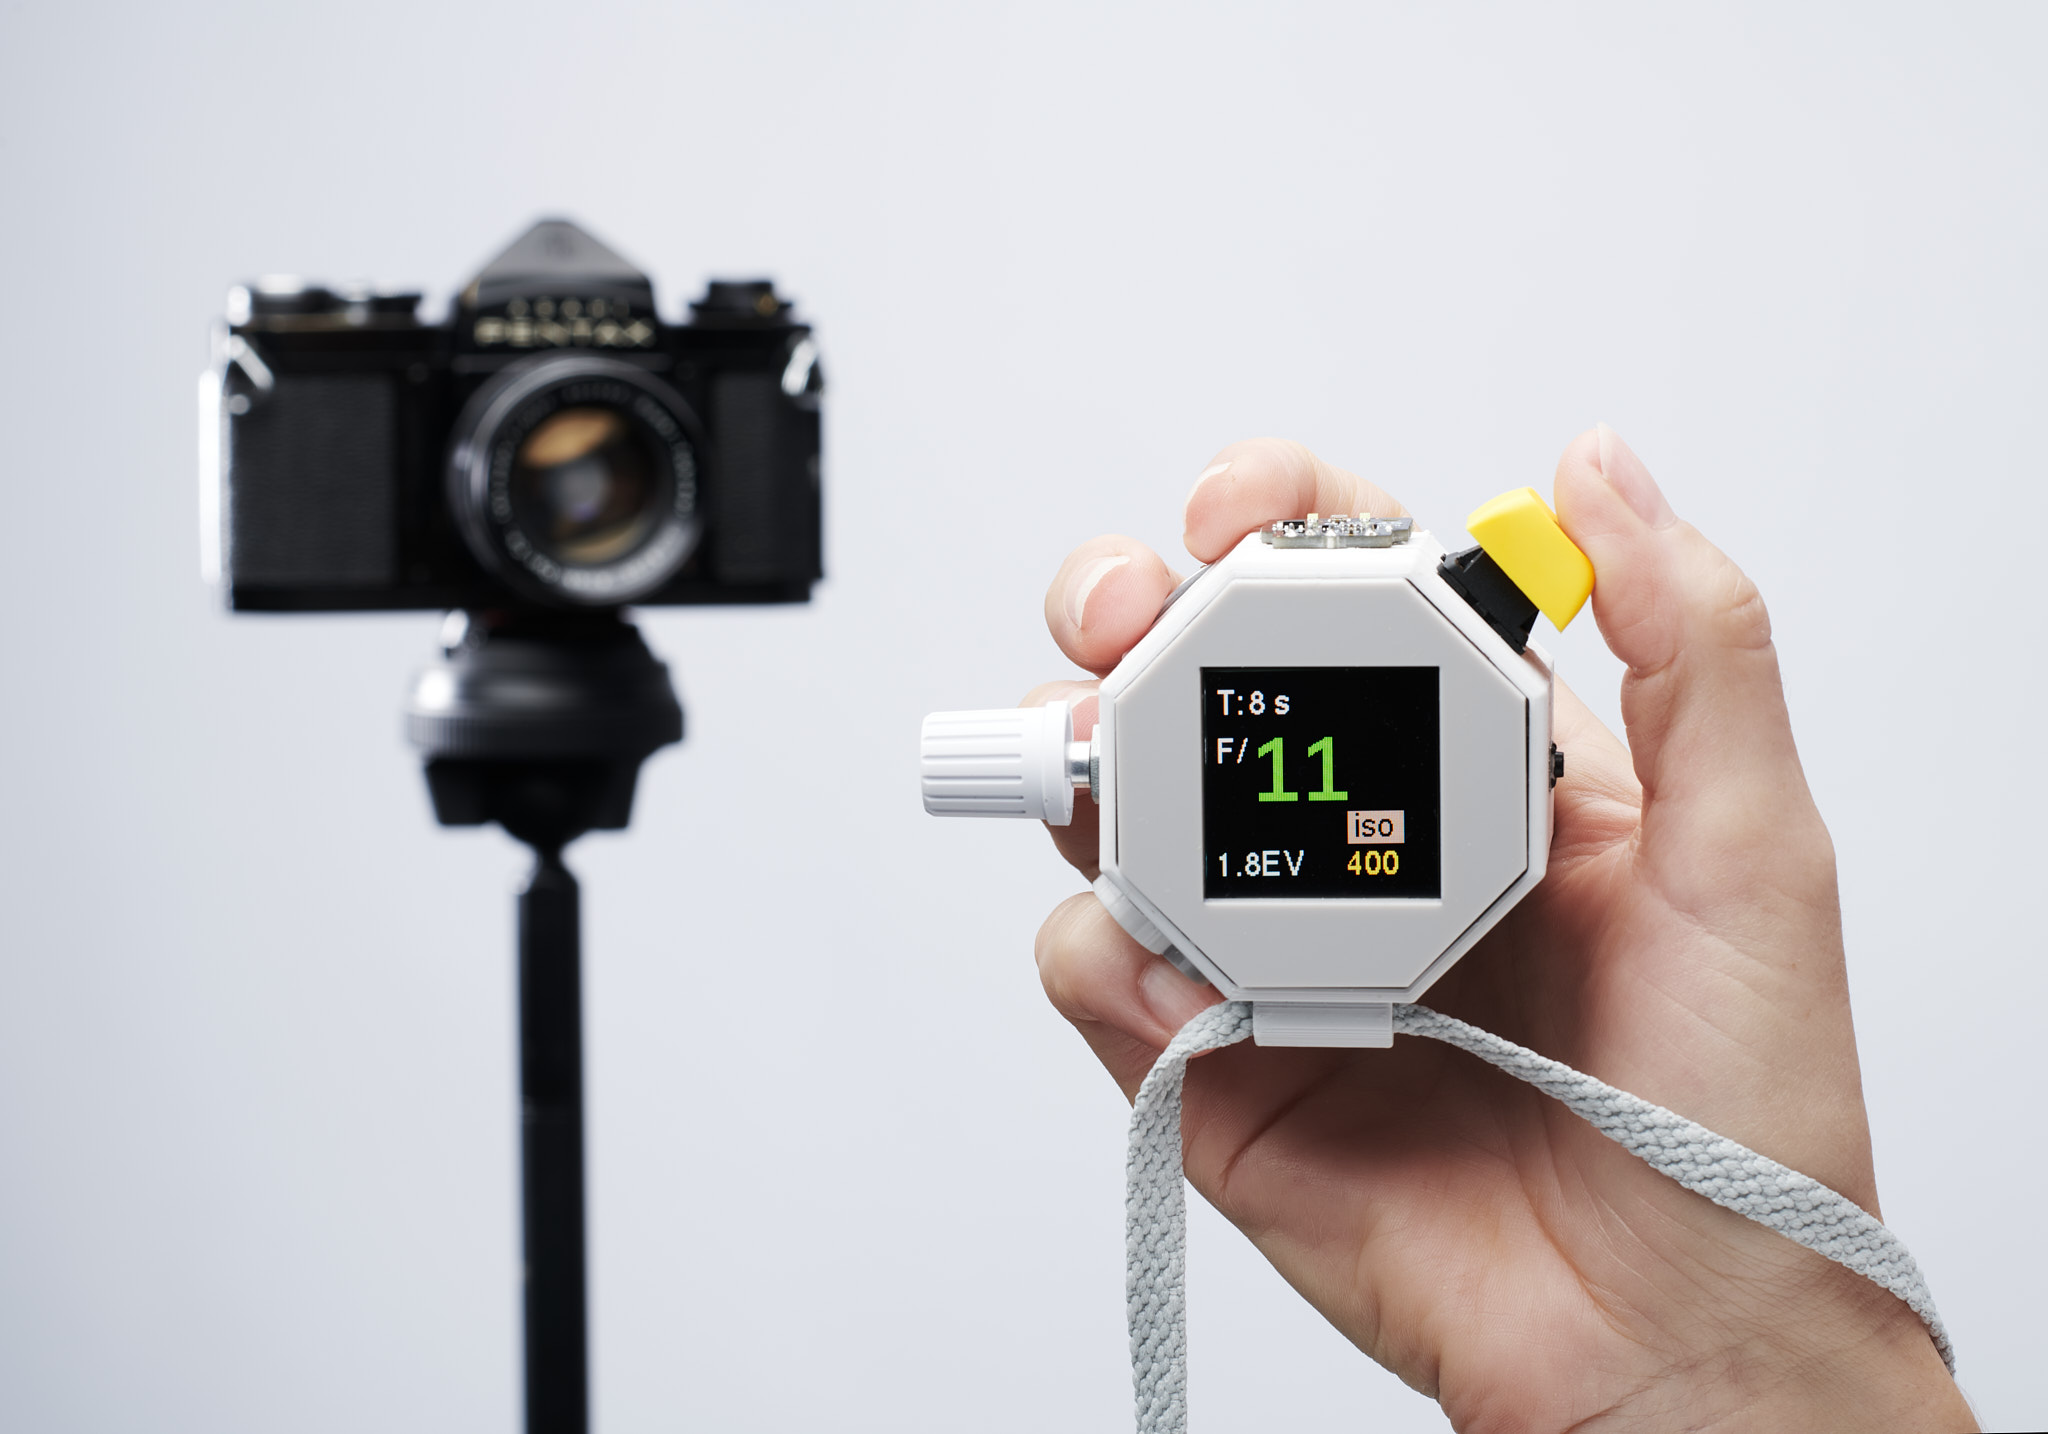


Photon: an open-source incident light meter
Photon reproduces the some of the functionality of more expensive tools, using a few inexpensive/readily available parts. Currently it measures ambient light brightness, as well as the red, green and blue components of the light, which might allow White Balance readings in future iterations.
There is soldering involved, but don't let that put you off, it's easy.
COMING SOON: Custom sensor with Flash Mode
Background
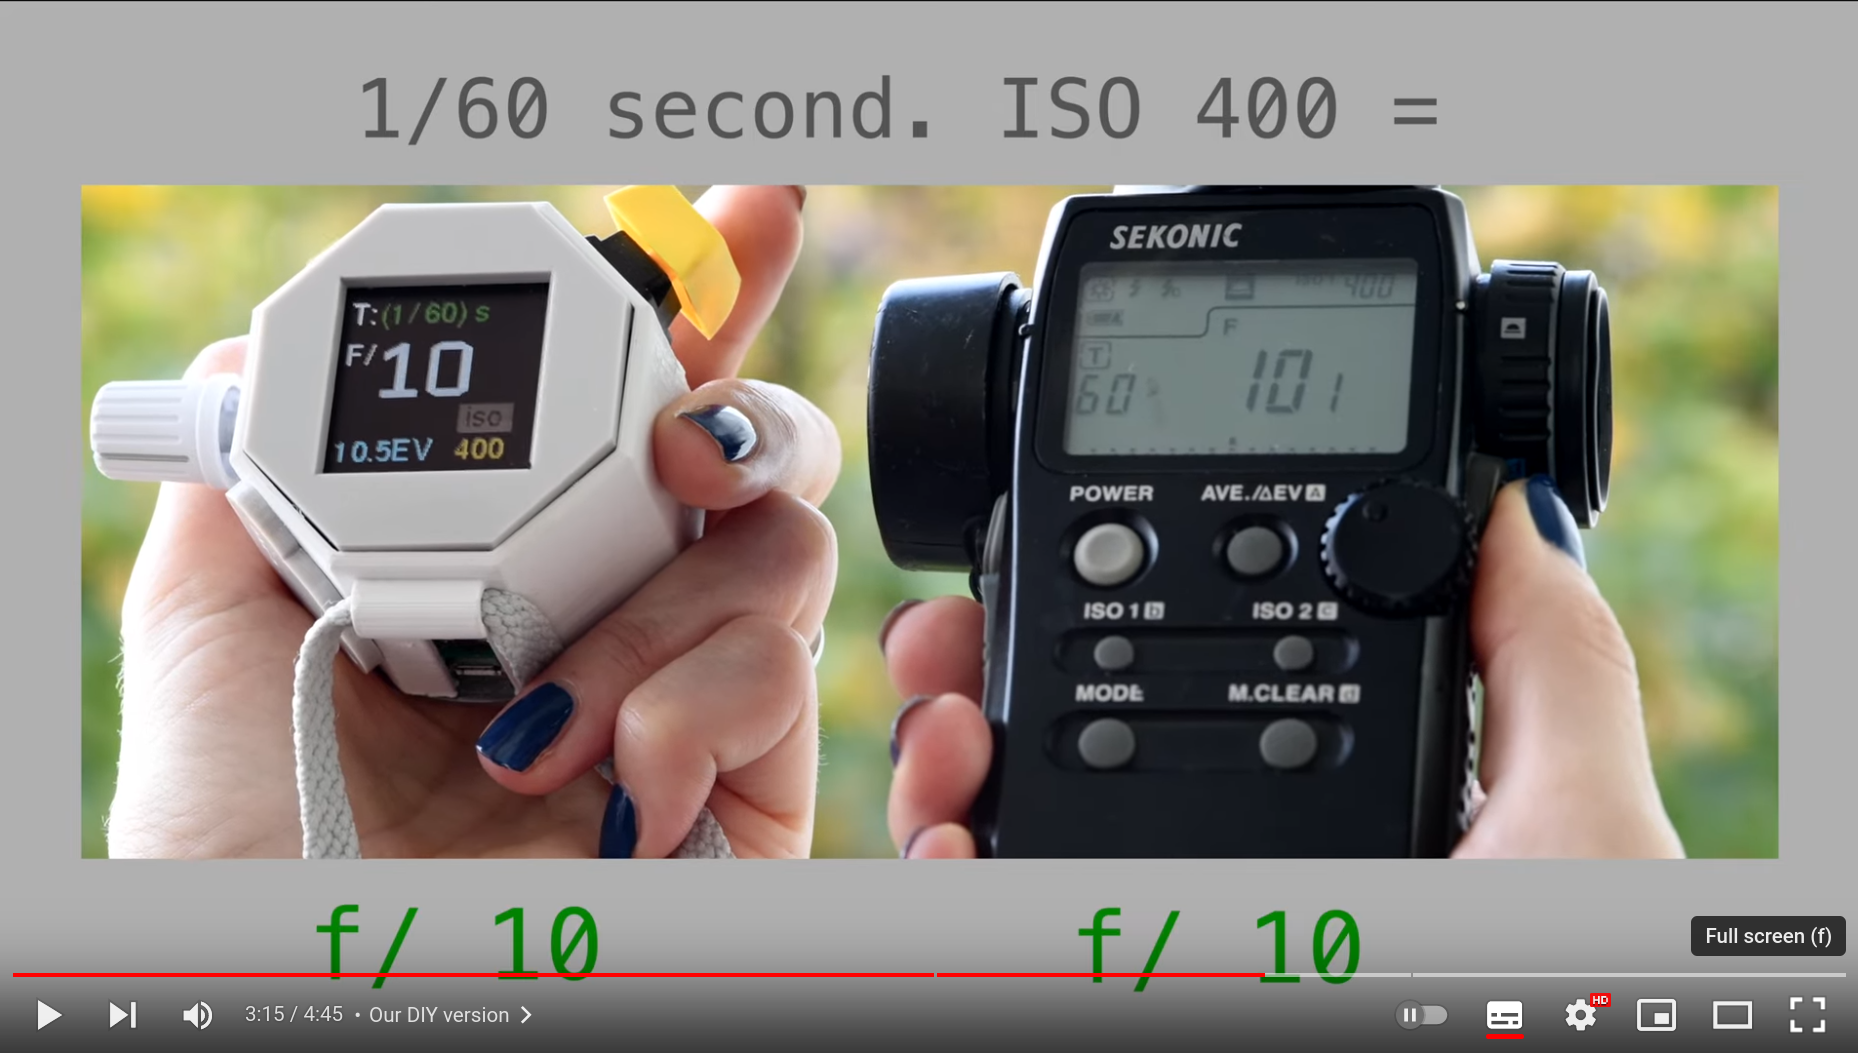
An incident light-meter can be an essential tool in photography (especially film photography with old cameras). The sophisticated computation baked-in to modern cameras devotes a lot of effort guessing 'how much light is falling on the subject?". If you have the option of getting to the subject and taking a reading, no guessing is required and everything becomes a lot easier. A more in-depth description in the video below:
Components
- Raspberry Pi Pico (or Pico Lipo, so you don't need to add the separate power shim)
- OLED Screen (Waveshare 128x128 full colour)
- LiPo Power shim (Pimoroni LiPo Pico shim - only if you a using a Pi Pico)
- Rotary encoder (adjust settings and change priority mode) (example)
- Two momentary switches (1x keyboard switch and 1x 6x6mm microswitch to measure light and set iso adjust mode respectively)
- Light Sensor (Pimoroni BH1745)
- LiPo/LiIon battery
Assembly
Hardware
If you're using one, solder the power shim to the pico following the Pimoroni instructions. Connect the Lipo/LiIon battery to the shim.
Then connect the rest of the components to the GPIO pins as described in the tables below. (VCC and GND are also connected to the pico for all except the switch)
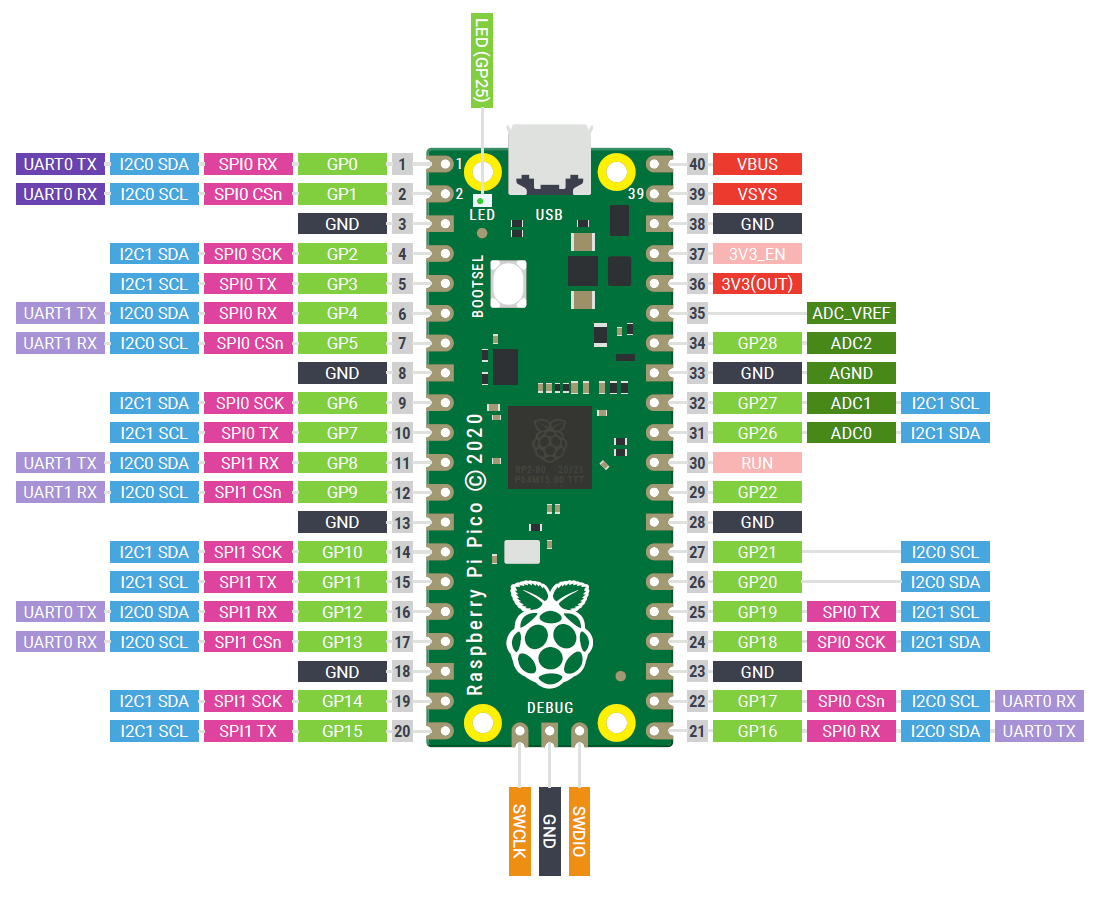
Light Sensor
| Pico GPIO | BH1745 |
|---|---|
| 4 | SDA |
| 5 | SCL |
OLED
| Pico GPIO | OLED | Pin Number |
|---|---|---|
| 19 | DIN/MOSI | 25 |
| 18 | CLK/SCK | 24 |
| 17 | CS | 22 |
| 20 | DC | 26 |
| 21 | RST | 27 |
Rotary Encoder:
| Pico GPIO | Rotary Encoder |
|---|---|
| 6 | CLK |
| 7 | DT |
| 8 | SW |
The Two Switches
Connect one end of the switch to GND, and the other to:
| Pico GPIO | Switches |
|---|---|
| 15 | Measure (Keyboard Switch) |
| 22 | ISO (6x6mm switch) |
Enclosure Assembly
Once you've tested that things are working, squeeze the parts into an enclosure. If you have access to a 3D printer, there are stl files in the cases directory.
Software
Download a uf2 image from the Pimoroni github repository and install it on the Pico according to the instructions. You need to use the Pimoroni image to be able to use Pimoroni drivers for the light sensor.
Clone this repository to your computer using the commands (from a terminal):
cd ~
git clone https://github.com/veebch/photon.git
cd photon
Check the port of the pico with the port listing command:
python -m serial.tools.list_ports
Now, using the port path (in our case /dev/ttyACM0) copy the contents to the repository by installing ampy and using and the commands:
ampy -p /dev/ttyACM0 put drivers/
ampy -p /dev/ttyACM0 put gui/
ampy -p /dev/ttyACM0 put color_setup.py
ampy -p /dev/ttyACM0 put main.py
(nb. make sure you are using the right port name, as shown in the port listing command above)
Done! All the required files should now be on the Pico. When you disconnect from USB and power on using the button on the power shim the script will autorun.
Using the Light Meter
A tutorial on getting the most out of your new meter is in the docs section.
Press
German
Contributing to the code
If you look at this, find it interesting, and know you can make it better then please fork the repository and use a feature branch. Pull requests are welcome and encouraged... in a nutshell:
- Fork it
- Create your feature branch (git checkout -b feature/fooBar)
- Commit your changes (git commit -am 'Add some fooBar')
- Push to the branch (git push origin feature/fooBar)
- Create a new Pull Request
If that all looks a bit too programmy, and if you have some photography expertise that you think could be embedded in the code then raise an issue on GitHub or contact us.
Licence
GNU GENERAL PUBLIC LICENSE Version 3.0
Appendix
Calculation of Values
The simple calculations that lead to a reading are based on the Wikipedia entry on exposure value.
The illuminance returned by the Pimoroni BH1745 ( $L$ ) is converted to an exposure value ( $E_v$ ) for ISO 100 using
$$E_v=\log _2 {{L} \over {C}},$$
where $C$ is the light meter calibration constant.
This exposure value is then adjusted to an Exposure value for the chosen ISO ( $E_{ISO}$ ) using
$$E_{ISO}=E_v + \log_2 {{ISO}\over{100}}.$$
Then, depending on the priority on the light meter, the remaining value is calculated using
$$t = {{N^2} \over {2^{E_{ISO}}}}$$
or
$$N = \sqrt{t 2^{ E_{ISO}}}$$
where $t$ is shutter speed and $N$ is f-stop. The value is then rounded to the nearest nominal value and displayed on the screen.