
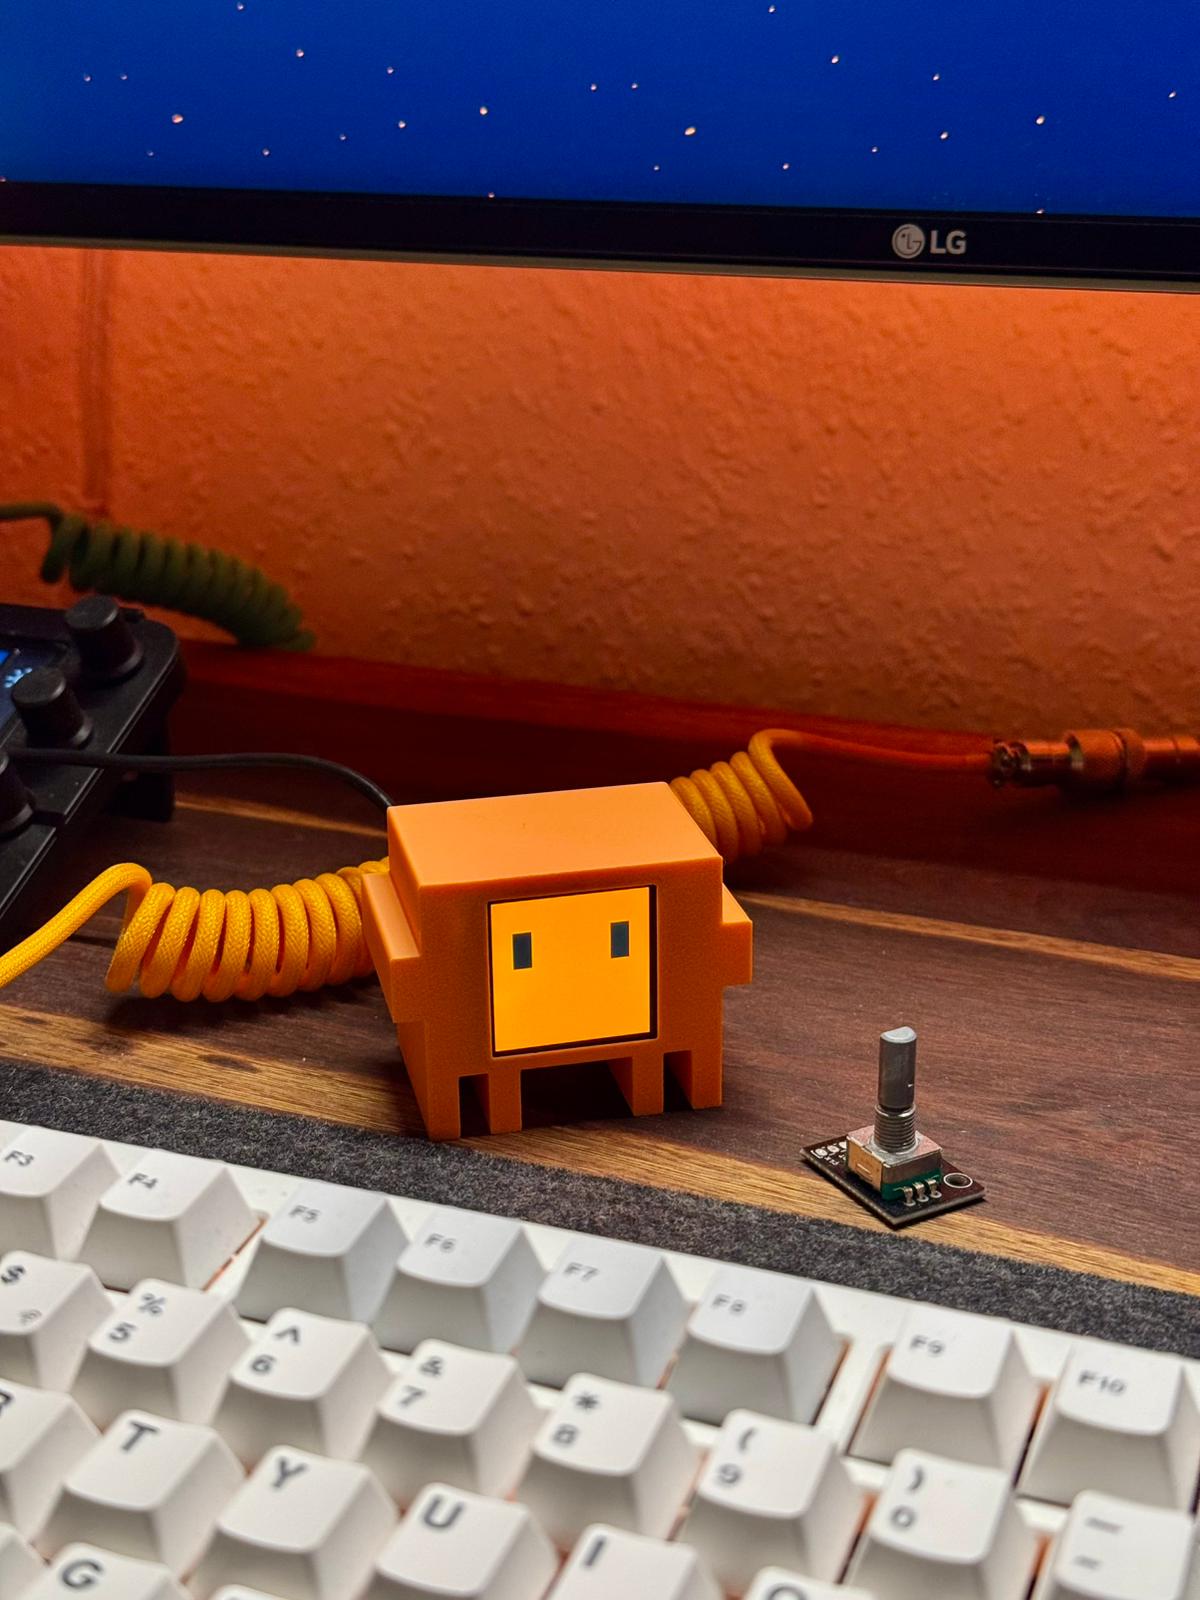
Clawd Mochi 🦀🤖
A physical desk companion inspired by Clawd — the pixel-crab mascot of Claude Code by Anthropic. An ESP32-C3 drives a 1.54" color TFT display and hosts a mobile web controller — no app, no internet, no cloud required.
Cost: ~$6–8 · Build time: ~1 hour · Skill level: Beginner
Support the project on Instagram:
📦 3D printable case on MakerWorld: https://makerworld.com/en/models/2559505-clawd-mochi-physical-claude-code-mascot#profileId-2820000
⚠️ This is an independent fan project. It is not affiliated with, sponsored by, or endorsed by Anthropic. "Claude" and "Clawd" are trademarks of Anthropic.
What it does
Clawd Mochi sits on your desk and shows animated expressions on a small color display. You control it from any phone or browser by connecting to its built-in WiFi hotspot:
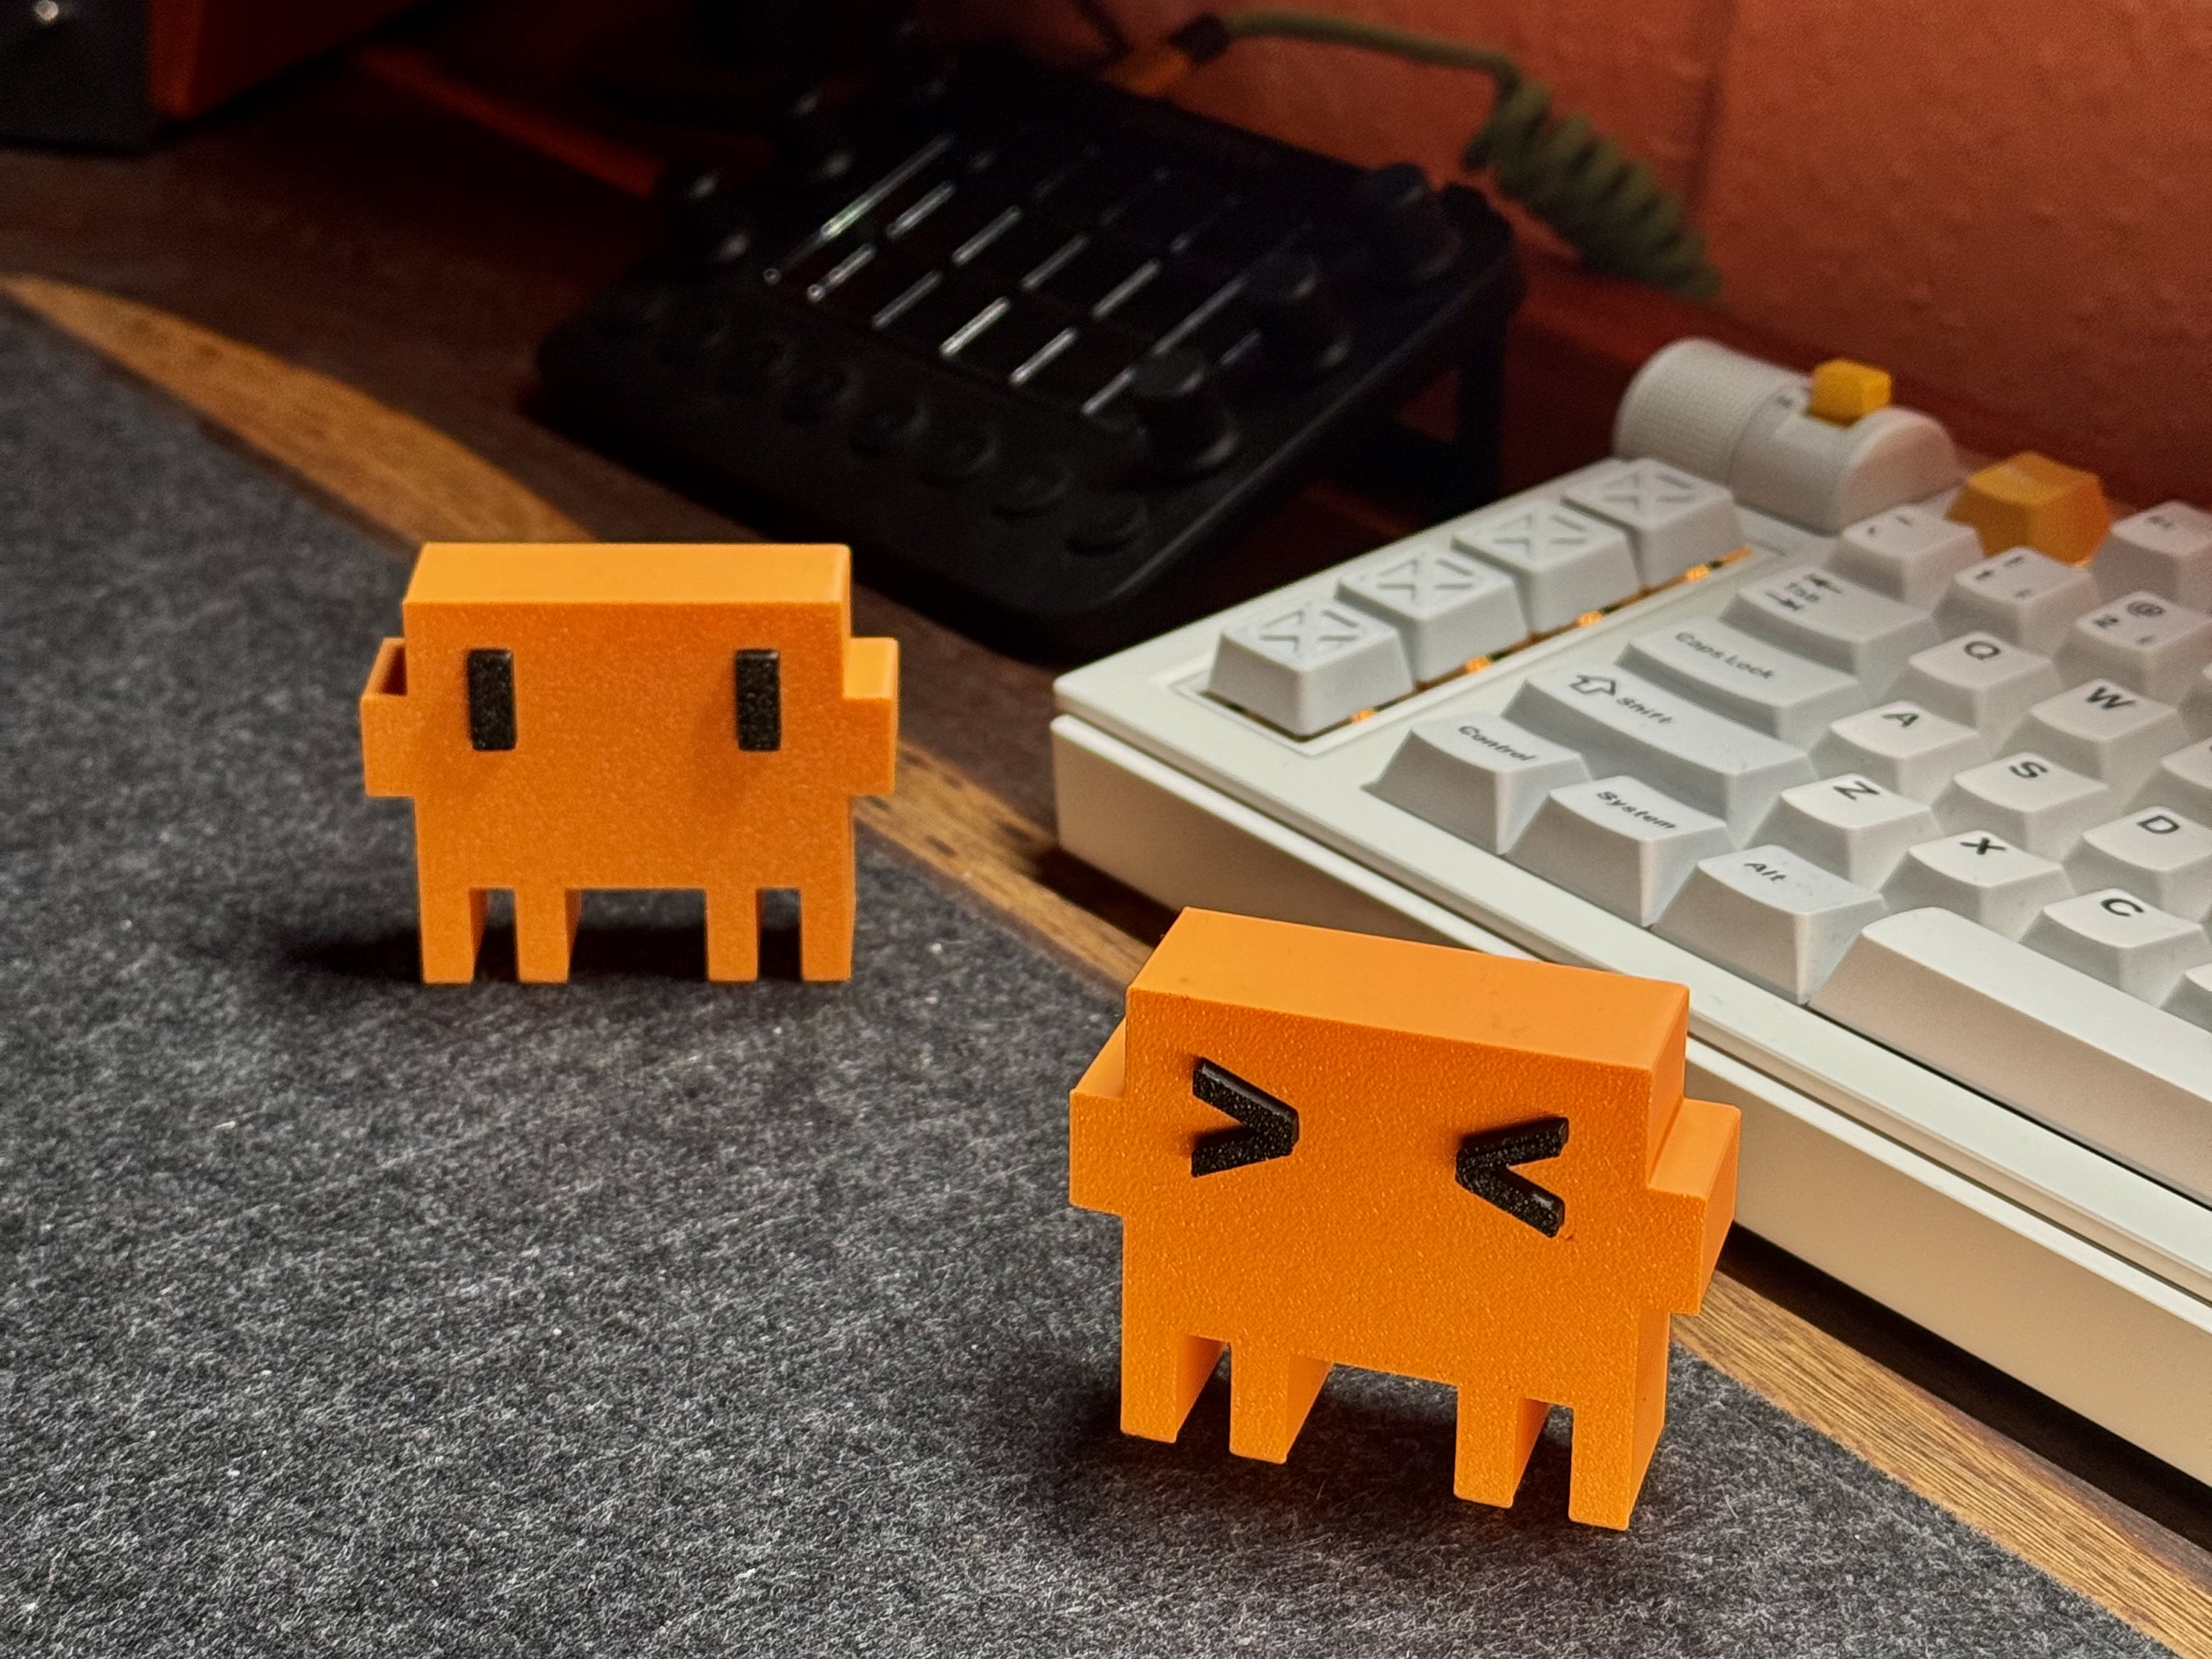
- Normal eyes — pixel-art square eyes with wiggle and blink animations
- Squish eyes —
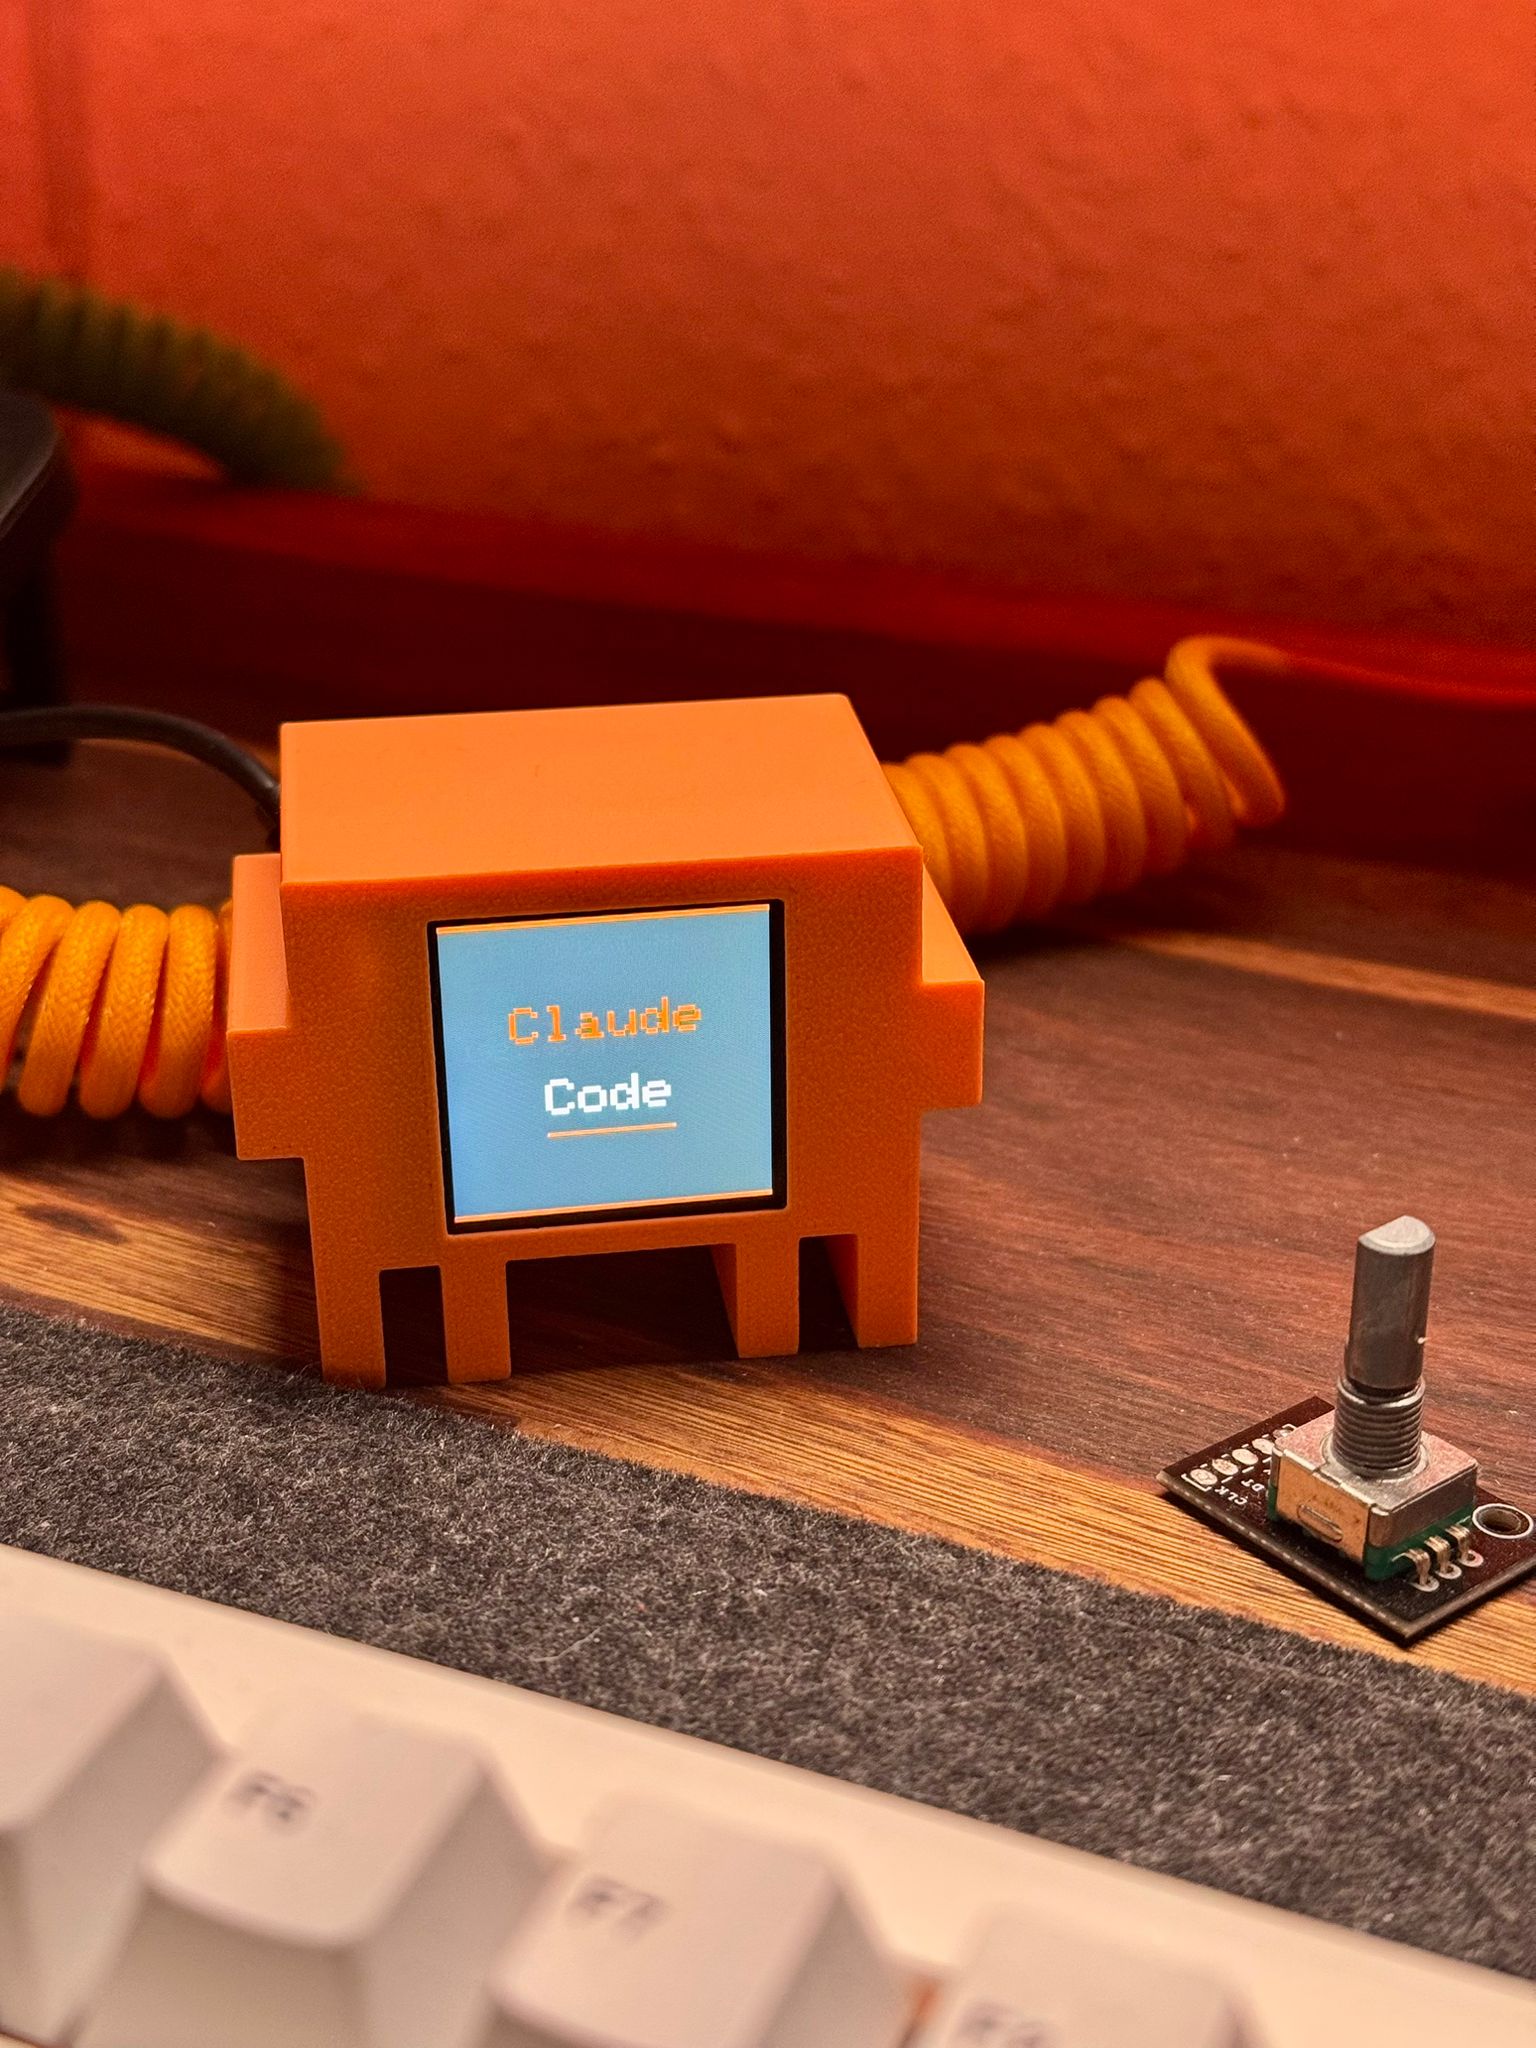
> <happy squint with open/close animation - Claude Code — displays "Claude Code" with an interactive terminal
- Canvas — draw anything on the display from your phone in real time
Parts list
| Part | Spec | ~Price |
|---|---|---|
| ESP32-C3 Super Mini | microcontroller with WiFi | ~$2.50 |
| ST7789 1.54" TFT | 240×240 SPI color display | ~$3.00 |
| 8 short wires | 8–10 cm Dupont / jumper wires | ~$0.50 |
| 2× M2×6mm screws | to mount display bezel | ~$0.10 |
| Double-sided tape | to secure components inside case | ~$0.10 |
| USB-C cable | for power | — |
| 3D printed case | PLA or PETG, ~30g | ~$0.50 |
Total: ~$7–8
Wiring
⚠️ Connect VCC to 3.3V only — never 5V. Use GPIO 8 and 10 for SPI (hardware SPI, fast). Do not use GPIO 6/7 for SPI.
| Display pin | ESP32-C3 GPIO | Wire color (suggested) |
|---|---|---|
| VCC | 3V3 | Red |
| GND | GND | Black |
| SDA | GPIO 10 (MOSI) | Orange |
| SCL | GPIO 8 (SCK) | Green |
| RES | GPIO 2 | Purple |
| DC | GPIO 1 | Blue |
| CS | GPIO 4 | White |
| BL | GPIO 3 | Yellow |
Software setup
Step 1 — Install Arduino IDE
Download Arduino IDE 2.x and install it.
Step 2 — Add ESP32 board support
- Open Arduino IDE → File → Preferences
- In "Additional boards manager URLs" paste:
https://raw.githubusercontent.com/espressif/arduino-esp32/gh-pages/package_esp32_index.json - Go to Tools → Board → Boards Manager, search
esp32, install "esp32 by Espressif Systems"
Step 3 — Install libraries
Go to Tools → Library Manager and install both:
Adafruit GFX LibraryAdafruit ST7735 and ST7789 Library
Step 4 — Configure board settings
Go to Tools and set:
| Setting | Value |
|---|---|
| Board | ESP32C3 Dev Module |
| USB CDC On Boot | Enabled ← important |
| CPU Frequency | 160 MHz |
| Upload Speed | 921600 |
Step 5 — Upload the sketch
- Clone or download this repo
- Open
clawd_mochi/clawd_mochi.inoin Arduino IDE - Connect the ESP32 via USB-C
- Select the correct port under Tools → Port
- Click Upload (→ arrow button)
- Wait for "Hard resetting via RTS pin..." — this means success
How to use it
Connect and open the controller
- Power the ESP32 via USB-C (any USB charger or power bank)
- Wait ~3 seconds for the boot animation to finish
- On your phone or computer, go to WiFi settings
- Connect to the network:
ClaWD-Mochi· password:clawd1234 - Open a browser and go to
http://192.168.4.1
You should see the web controller:
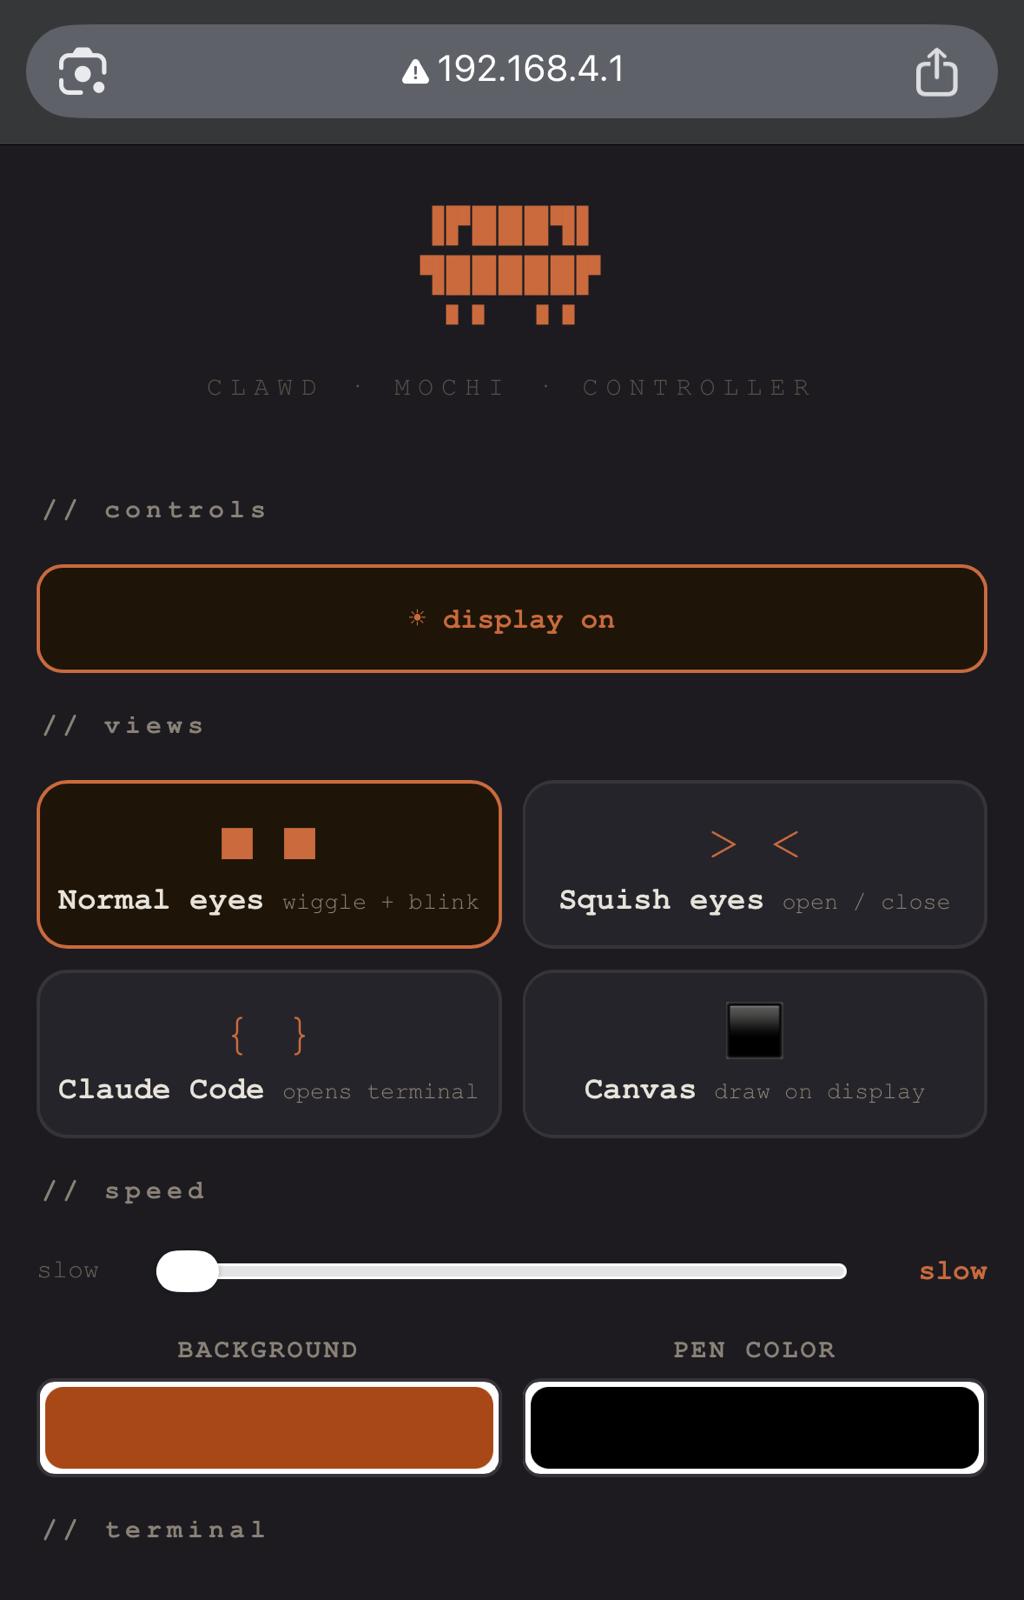
Controller features
| Button / control | What it does |
|---|---|
| Normal eyes | Plays wiggle + blink animation |
| Squish eyes | Plays open/close animation |
| Claude Code | Shows code display, opens terminal |
| Canvas | Enter drawing mode — draw on display from phone |
| Speed slider | Controls animation speed (slow / normal / fast) |
| Background color | Changes background color of all views |
| Pen color | Sets drawing color for canvas |
| Display on/off | Toggles the backlight |
| ✓ done (in canvas) | Exits canvas mode |
3D case
The electronics case (body + back) is in the clawd_mochi model folder:
| File | Description |
|---|---|
./models/clawd_mochi/clawd_mochi_v1.stl | Main case layout with body and back parts |
Print settings
| Setting | Value |
|---|---|
| Material | PLA or PETG |
| Layer height | 0.15–0.20 mm |
| Infill | 15% gyroid |
| Supports | Yes — for display window overhang |
| Orientation | Face-down, flat back on build plate |
Suggested colors: orange PLA for body, matte black for back plate.
You can also download the models from MakerWorld: https://makerworld.com/en/models/2559505-clawd-mochi-physical-claude-code-mascot#profileId-2820000
3D Clawd (no electronics)
If you just want a display piece, use the separate 3D Clawd model (no screen or electronics cutouts).
Model files:
| File | Description |
|---|---|
./models/clawd_3d/clawd_3D_no_AMS.stl | Original Clawd 3D model |
./models/clawd_3d_squished_eyes/clawd_3D_squished_eyes_no_AMS.stl | Squished eyes variant |
You can also download the models from MakerWorld: https://makerworld.com/en/models/2576503-clawd-claude-code-mascot#profileId-2841183
Assembly tips
- Print the case file (body + back) and test-fit the display before gluing anything
- Thread the 8 wires through the back plate slot before soldering
- Use double-sided tape to fix the ESP32 against the inside of the back plate
- Secure the display with 2× M2×6mm screws through the bezel holes
- Route the USB-C cable through the back plate slot and snap the back on
Customisation
Eye size and position
Edit these constants near the top of clawd_mochi.ino:
#define EYE_W   30    // eye width in pixels
#define EYE_H   60    // eye height in pixels
#define EYE_GAP 120   // gap between eyes
#define EYE_OX  0     // horizontal offset
#define EYE_OY  40    // vertical offset upward
Logo animation duration
// In animLogoReveal() — how long logo holds after animation
delay(1500);       // milliseconds — change this number

// Speed of the reveal drawing stroke by stroke
delay(speedMs(8)); // lower = faster
Contributing
Contributions are very welcome! Here are some ideas:
- New animations — add new expressions, transitions, or idle behaviors
- New views — weather display, clock, notification badges, pixel art scenes
- Sound — add a small buzzer for sound effects
- Sensors — connect a touch sensor or button for physical interaction
- OTA updates — add over-the-air firmware updates
- MQTT / Home Assistant — connect to smart home platforms
To contribute: fork the repo, make your changes, and open a pull request. Please keep the single-file structure (clawd_mochi.ino) so it stays easy for beginners to flash.
License
This project is licensed under the MIT License — see the LICENSE file for details.
Note: 3D models and media assets are licensed under CC BY-NC-SA 4.0.